
Layer 1 and Cave Troll Guide
Activate Layer 1 lodestones until the dungeon appears, prepare before entering the walled boss area, defeat the Cave Troll in open space, then use the blue portal to reach Layer 2. A random pit near the lair can sometimes provide an alternate descent.
The short version
- Open the map and activate nearby lodestones to reveal additional points of interest.
- Look for the red Dungeon marker and approach with healing, resistance and a ranged option.
- Fight outside tight corridors, clear smaller enemies and save stamina for deliberate dashes.
- After the Cave Troll dies, enter the blue portal to Layer 2; a random nearby pit may be an alternative.
Find the Layer 1 exit route
- 01
Prepare in the kingdom
Bring a functioning weapon, healing, light and enough ranged damage or explosives for a long fight. Bank unrelated valuables first.
- 02
Open the map at the start of the run
A nearby lodestone can be visible early. Travel toward it without turning the trip into an all-room clear.
- 03
Activate lodestones
Activated lodestones reveal more structures or points of interest. Continue until the Cave Troll dungeon is marked in red.
- 04
Approach the walled dungeon deliberately
Clear the immediate approach and identify open ground before triggering the boss chase.
- 05
Defeat the Cave Troll and use the portal
A blue portal appears after the boss dies. Enter it to descend to Layer 2.
Recognize the Cave Troll attacks
| Attack | Signal and danger | Response |
|---|---|---|
| Charge and club slam | The Troll closes distance and creates area damage | Move early and preserve a dash for the final correction. |
| Roar and falling rubble | Ceiling debris adds area pressure and can bring smaller enemies into the fight | Leave the impact area and clear adds before resuming damage. |
| Diagonal shockwave | A ground hit sends damage outward on diagonal lines | Create distance and move between the projected paths rather than staying in melee. |
Use a low-risk fight plan
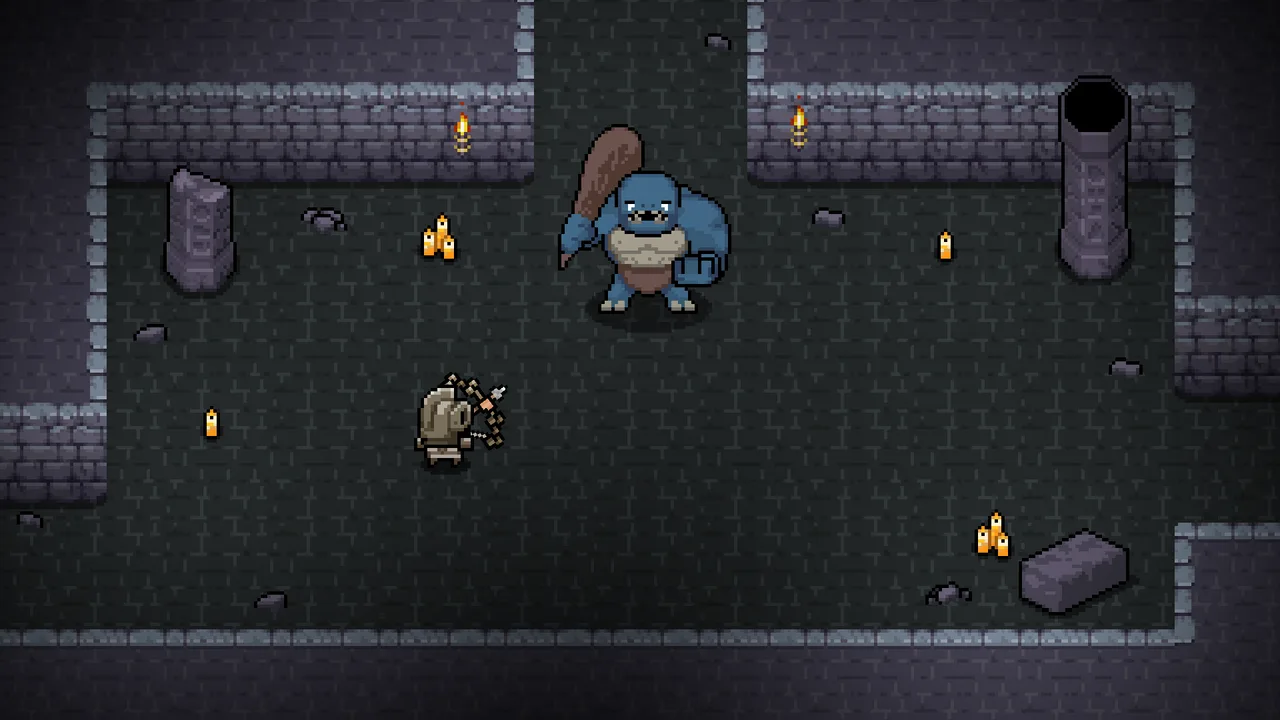
- Lure the boss from tight corridors into open ground.
- Use ranged damage or explosives to limit close contact.
- Clear smaller enemies instead of letting them combine with the boss pressure.
- Keep a retreat lane and do not let the Troll pin you against cave geometry.
- Dash for a specific attack, not every movement; stamina is part of the survival margin.
- Heal during a real opening instead of continuing at one-hit health.
The random pit alternative
A fresh version 1.0 guide and the older community exit guide both report that a large pit can appear around the edge of the Cave Troll lair and lead to Layer 2 without the boss fight. It does not appear every run.
Treat the pit as an opportunistic route, not a guaranteed plan. If the story step specifically requires the Cave Troll, skipping the boss may not satisfy that separate quest condition.
Frequently asked questions
How do I find the Cave Troll?+
Activate Layer 1 lodestones until the red Dungeon point of interest is revealed, then travel to the walled dungeon area.
What opens the way to Layer 2?+
Defeating the Cave Troll opens a blue portal. A randomly spawning pit near the lair may also descend to Layer 2.
What gear is required?+
No single loadout is mandatory. Fresh guidance recommends strong resistance, healing and a ranged option or explosives to reduce close contact.
Below the Stone: S6, S9, S10, S11 · 2026-11-22. Claims: C11, C12, C13.
- cross-checked The map can mark lodestones, broken escape pods, structures and dungeons, and activated lodestones can reveal additional points of interest.
- cross-checked Defeating the Cave Troll in its Layer 1 dungeon opens a blue portal to Layer 2; a randomly appearing pit near the lair may provide an alternate descent.
- community-reported The Cave Troll uses a close-range slam, falling-rubble roar and diagonal shockwave; current player-tested advice favors open space, ranged damage, add control and disciplined dash/heal use.